Friday, July 28, 2017

One Fantastic Solution to Too Many Pictures: Yearbooks

Digital photography allows us to take a lot of photos any time.  We can get just the right shot even if it takes twenty tries.  The downside, though, of digital photography is that we often have way too many photos to even deal with.  It can be {overwhelming}.  Unfortunately, this situation is a common one, and many people don’t even know {where to start} when they think about actually preserving their photos, memories, and stories.  One of my favorite solutions to this problem is a Yearbook (sometimes called a Family Yearbook).


I'm excited to share this with you today because it's not just an idea or a suggestion.  This is a solution!  This can actually help you preserve and see your pictures if you haven't done so for a while because you have too many.  So what's a yearbook?

Simply stated, a yearbook is one year’s worth of photos preserved in one book.  This method is one I recommend often, especially to people who just have a lot of photos and don’t know where to start.  I love this method because:
  • It makes logical sense.  You know where to start and where to end:  January 1-December 31.  Everything from that year will go in one place.
  • Because it’s chronological, it’s easy to break down a mountain full of 400 pictures into sections (organized by month).  From there, it’s easier to decide what’s worth preserving and {what’s extra}.
  • You only have to work with part of your pictures at a time.  Instead of staring down 8 years’ worth of photos, you’re only dealing with ONE.
Keep reading to find two plans to create your yearbook.  One gets you a yearbook every six months, and the other is in just 8* weeks!  

*2021 UPDATE:  a new platform makes it just 4 weeks now!

Yearbooks can be created physically (with paper or albums) or digitally.  The most important aspects of a family yearbook are high quality and journaling (write the memories that go with the photos).  I prefer high quality digital family yearbooks because, among {many other reasons}, it’s easy to get multiple copies.


Having a lot of photos that you know need to be preserved can be overwhelming.  It can really be a daunting task sometimes.  Yearbooks really break things down into doable parts.  Start with some of the basic tools you’ve seen here on #familyhistoryfriday posts to organize your photos, or explore the tabs at the top of this page (under the header) and then start creating your own family yearbooks, one year at a time.

Before I get into the solutions and approaches, let me define for you what I call the Yearbook Method.  It's beneficial for anyone who has a lot of photos and needs to pare them down.  It begins with the often surprising revelation that we don't actually have to save every photo we take.  There's no rule that says we have to save every photo.  It's ok--and sometimes extremely wise--to sort through our photos and preserve just the absolute keepers.  

The Yearbook Method is simply this:  Create just two pages for each month of the year.  This helps you just choose and preserve your very favorite photos and memories.  In addition to making your photos more manageable, another benefit of the Yearbook Method is that it is more inexpensive to print a book with only 25 pages than it is with 99.

If the Yearbook Method is not for you, that's ok.  I have a hard time paring down my photos, so my yearbooks are more than 25 pages.  Whether you subscribe to the Yearbook Method or not, you can preserve your precious photos and memories in meaningful, heirloom-quality pages using any of the suggestions I'm about to outline for you.  

UPDATE 2021:  I think this is the simplest way to create yearbooks because you're using a template in a program that takes about 2 minutes to learn!  See what you think at this short video I created for you:

If you're worried that starting to preserve your photos from one year won't help you make progress in the end since you're still taking more pictures, don't!  I've got you covered!  Here are the two approaches I mentioned earlier:

THE TWO-IN-ONE PLAN (TWO YEARBOOKS IN ONE YEAR)
One of the best tips I’ve ever heard for catching up on your photos is to have a {2-in-1 plan} (Scroll down to the 8-week plan for helpful links as you create your pages.)


Here's how it works.  If you spend this year preserving the photos from, say, 2012, then you still haven’t preserved the photos from this year.  So if you can take out two years in one, you’re getting ahead and you’ll catch up!  Preserving one years’ worth of photos in six months is the perfect 2-in-1 plan, and it works like this:
  1. FIRST MONTH:  Preserve photos and memories from January and February from your chosen (past) year.
  2. SECOND MONTH:  Preserve photos and memories from March and April from your chosen year.
  3. THIRD MONTH:  Preserve photos and memories from May and June from your chosen year.
  4. FOURTH MONTH:  Preserve photos and memories from July and August from your chosen year.
  5. FIFTH MONTH:  Preserve photos and memories from September and October from your chosen year.
  6. SIXTH MONTH:  Preserve photos and memories from November and December from your chosen year.
  7. SEVENTH MONTH:  Preserve photos and memories from January and February from the current year!
  8. EIGHTH MONTH:  Preserve photos and memories from March and April from the current year.
  9. NINTH MONTH:  Preserve photos and memories from May and June from the current year.
  10. TENTH MONTH:  Preserve photos and memories from July and August from the current year.  
  11. ELEVENTH MONTH:  Preserve photos and memories from September and October from the current year.
  12. TWELFTH MONTH:  Preserve photos and memories from November and December from the current year.
REPEAT AS NEEDED!

Don't you love how that can help you actually get caught up preserving pictures?


YEARBOOK BOOT CAMP (ONE YEARBOOK IN JUST 8 WEEKS!)
Or, try my Yearbook Boot Camp!

This approach is a faster one than the Two-in-One Plan, so you have to dedicate more time to it each week, but a lot of people love it because it gives you a yearbook quickly!  That the momentum can propel you forward sooner, so you're ready to create more yearbooks.  It helps you catch up in no time.  You'll need to set aside 1-3 hours (approximately) each week to follow the plan outlined below.  This gives you a yearbook in just 8 weeks!

UPDATE 2021:  For an even faster Yearbook, I love this new platform where we can finish a yearbook in just 4 weeks.  See my two videos about a Yearbook in just 4 weeks here.  I host this as an online class where we learn a little at the beginning and then work the rest of the time, so if you'd like to request a class and bring a few friends, just contact me.

Here's how the 8-Week Yearbook Boot Camp works:

WEEK 1: 
  1. Choose the year's worth of photos you want to preserve (2018, 2012, etc.)  
  2. Organize the photos from that year on your computer.  I made this video to help.  
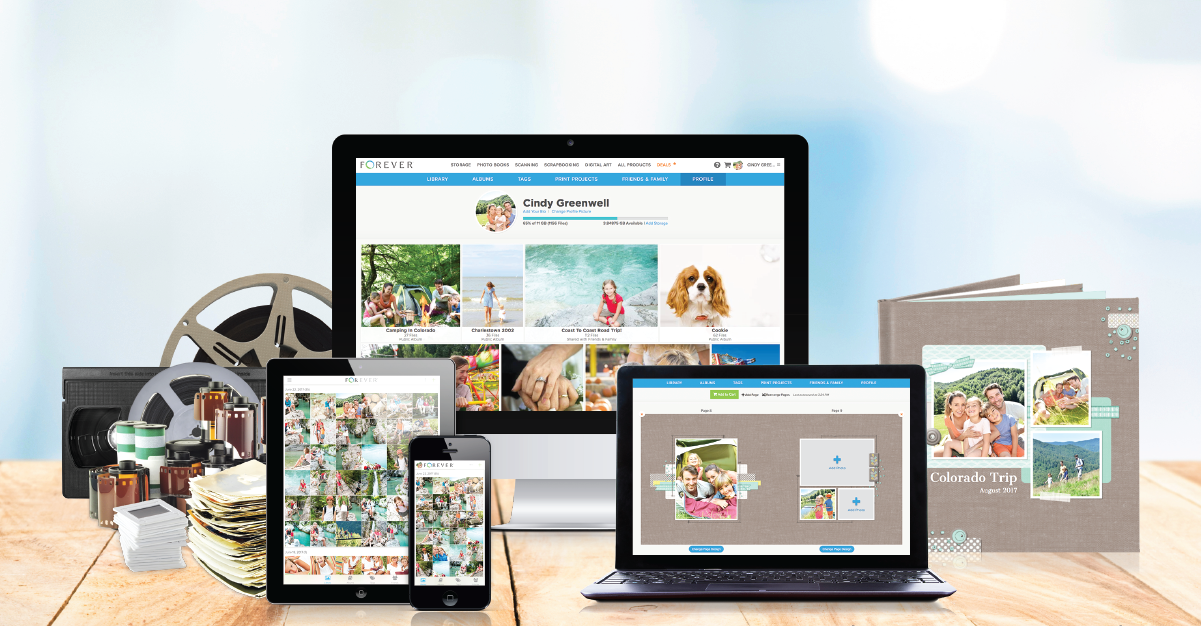
  3. Open your Forever account at this link if you don't already have one.  (It's free!)  I recommend and use Forever because of its heirloom-quality products, 100% satisfaction guarantee, and its photo privacy policies.
  4. Upload the photos from your chosen year into your Forever account.  (By the way, Forever is rare in that they don't reserve rights to your photos, they allow you to download your photos back at full resolution for free, and upgraded Forever Storage guarantees your photos for your lifetime plus 100 years.  This tutorial video explains Forever Storage.)
WEEK 2:
  1. Choose the book size you'd like to create.  12x12 and other large sizes are best for yearbooks because they showcase many photos well. 
  2. Learn about The Yearbook Method in 2 minutes.  Watch this video from minute 15 - minute 17.
  3. Choose your favorite yearbook template.  In your Forever account, click "Create and Print," then "Design & Print," "Photo Books." Type in "yearbook" in the search field to find lots of options.  There are lots of templates to choose from.  Click any you want to see more of, and you'll be able to scroll down and see the pages.  (Note:  If you prefer not to use a template but to instead have full flexibility and creativity, I highly recommend Forever's Artisan digital scrapbooking software.)
WEEK 3:
  1. Now you're ready to go!  This week, complete the front and back cover, the title page, and the two January pages.
WEEK 4:
  1. Complete the two February pages in your yearbook, the two March pages, and the two April pages (or more if you've decided to add more).
WEEK 5:
  1. Complete the two May pages and the two June pages in your yearbook (or more if you've added more pages for either of these months).
WEEK 6:
  1. Complete the two July pages and the two August pages (or more if you add more).
WEEK 7:
  1. This week, complete the two September and the two October pages in your yearbook (or more pages in those months if needed).
WEEK 8:
  1. Complete the November and the December pages in your yearbook!  YAY!
  2. Order your completed yearbook!  Pat yourself on the back!
The Yearbook Boot Camp has helped many people get caught up on their photos and memories!  And yearbooks are a perfect way to simplify those thousands of photos you have.


It's time!  Find out just how fantastic the Yearbook approach is to solving your problem of having too many pictures:
  • Get started with Forever and follow either of the plans above, the Two-in-One Plan or the Yearbook Boot Camp plan.  I think the Design & Print (templates) platform from Forever is the best way to catch up quickly, but if you want more creative flexibility on your pages, Artisan by Forever is the way to go.  Contact me if you have questions.
  • Attend the next Yearbook Boot Camp with me!  It's so much fun, and the time set aside on your calendar helps make your good intentions into reality.
  • Request from me a private Yearbook Boot Camp with just you and your friends!  As host, you/we can share your Forever Referral Link and you'll probably end up printing your own book for free!

Creating Family Yearbooks is the best way I know of to preserve your photos when you have a lot of photos to preserve!  It can be a really neat and meaningful family time if you create your family yearbooks together, or it can be a fun surprise gift from you on your child’s birthday.  

Family Yearbooks provide all the {benefits of memory-keeping} that we need so much, and the connections they create help children and parents alike.

Share this post on social media or with someone you know who could use some help with too many pictures.

This post was originally published at www.livegrowgive.org on July 28, 2017, by Jennifer Wise, and updated in 2021.  More #familyhistoryfriday posts can be found by clicking the hashtag link next to Labels below.

Hooray!  This post was featured here:


Friday, July 21, 2017

Helps for Dating Nineteenth Century Photos

Are you lucky enough to have really old family photos floating around?  These treasures of your family story, or family history, are priceless.  If they aren’t already dated, there are a few clues and tips you can use to approximate a date.  Dating photos can sometimes even help you figure out who is in the photo.  So if you have a gem or two but don’t have dates, here are some helps on dating nineteenth century photos– and preserving them, too.


Did you know that knowing the photograph type can help you date it?

The photography process was perfected and made commercially available around 1837.  During the first 50 or 60 years of photography, photos looked very different– very different from each other, and definitely very different than they look today.  

Identifying the TYPE of photograph you have can give you an excellent clue into the date it was taken, which in turn can give you other clues and information about the photo.  You can find more detailed information at {PhotoTree}, but I’ll outline the basics here to help you identify 19th century family photos.  (photo cred: my father-in-law, from his own family history!)


DAGUERROTYPES 
The earliest photos were daguerrotypes.  Images were printed on mirror-polished, silver-plated copper.  The image was sharp and shiny and appeared to be floating.  It was only viewable at an angle, a little bit like a negative.  
Daguerrotypes are always encased as there are many layers– including a mat and glass –to create this type of photo, which is essentially a mirror with an image on it.  The average size for a daguerrotype was 2 5/8″ x 3 1/4″.  Daguerrotypes first appeared in 1839 and were most popular between 1842-1856.  By about 1860, they were no longer in use.

AMBROTYPES
Ambrotypes were a great improvement over daguerrotypes because they didn’t have to be viewed at an angle, and they didn’t tarnish, either.  The images were simply easier to see.  
Ambrotypes were sharp images on silvered glass and appeared to have a kind of depth to them, but they could be easily smudged by touching or cleaning.  Like a daguerrotype, the average size for an ambrotype was 2 5/8″ x 3 1/4″.  The shortest-lived type of photograph, ambrotypes first appeared in 1854 and were most popular between 1855-1861.  By about 1865, they were no longer in use.

TINTYPES
If you’ve got an old family photo that you can attach a magnet to, you’ve got a tintype.  With a tintype, images were made on a blackened iron plate– a thin sheet of iron.  Some tintypes were encased in paper sleeves, but many of those sleeves have not survived time.  
Tintypes were a very popular type of photograph because the price of photographs was dropping and people could afford to have more photos taken.  Many Civil War era photos are tintypes.   Tintypes (which aren’t actually tin) first appeared in 1856 and were most popular between 1860-1870.  Around 1870, tintypes were also available in “chocolate,” a distinctive brown hue.  Although they fell out of general popularity by about 1878, tintypes were still produced well past 1900 because they were used as novelty items at fairs, carnivals, and beach resorts.

CARTE DE VISITES (CDVs)
Carte de visites or CDVs were the first type of photos to be developed from a negative.  Images were first printed on thin paper and then attached to a stiff card stock paper.  The carte de visite changed photography!  Prices were still coming down, so photography was more accessible, but in addition, CDVs were the first opportunity people had to order multiple copies of one photo.  
Prior to the carte de visite, one image could be printed once– on a mirror, on glass, or on iron.  With the creation of a negative, it was now possible to get multiple copies to share.  Carte de visites ushered in the family photo album, too!  Thinner pictures and more of them meant you could collect pictures of family members.

If you’re trying to identify this type of photo, look for a border around the edges and studio background and props.  Most CDVs are a sepia tone.   Carte de visites first appeared in 1859 and were most popular between 1860-1880.  By the 1890s, they were not used as much.

CABINET CARDS
The cabinet card enjoyed as much longevity as the carte de visite, but cabinet cards are distinguishable by their bigger size and by artwork and print right on the card.  The print is often the name of the photographer or the location, which can help in dating the photo.  By the 1880s, the quality of cameras and papers for printing had improved, and many cabinet cards of the 1880s and 1890s look like artwork.  Some even have scalloped edges.  
Cabinet cards first appeared in 1866 and were most popular between 1874-1900.  Their popularity waned in the early 1900s.

Once you learn the type of photo you’re looking at, you can narrow down or approximate a date. 

Now that you know how to date 19th century photos, let's talk about how to preserve them!

 Making a digital version of treasures like this is a great way to preserve it for the future.  Scanning is the most common method of preserving a photo because it creates the sharpest and clearest image, but taking a picture of your old photo is another option.  

For a 4×6 size photo, scanning at 300 dpi is common, but if you want to enlarge the photo, or if the original is smaller than 4×6, scanning at 600 dpi (or even 1200 dpi) is recommended.  

Scanners are readily available these days as part of an all-in-one printer, but if you don’t have a scanner, your local photo processing store (Walgreens, Target, Walmart, etc.) often has scanners available to use right there at the store.  Or get white-glove service by {using the Forever Box for your scanning}--just click "digitize" at the top at that link.


Once your old photos are scanned, use them– share them.  Having a digital copy is good, but having a hard copy that you can see and enjoy is so much better!  Telling a family history or family story in a storybook like I’ve done here is a great way to share, and knowing family stories has {so many rewards}Family stories help us know we belong.  Knowing how our ancestors overcame their own hard times gives us courage and strength to overcome our own.

I love this "My Heritage" book I made a while back.  My uncle is a photographer, and since my grandma died he has become the family historian in charge of photos.  He scanned these wonderful photos of my ancestors and I preserved them for myself in this book along with a little paragraph about each one.  What I love about that is that I will never OWN these photos, but because of scanning and digital sharing, I can have them still.  I also love that housing them in a storybook means that my kids can touch them!  If I had those original 150-year-old pictures, I wouldn't let them be touched!  This is a user-friendly, kid-friendly way to see the faces of my family, including people I've never met!

Storybooks aren’t the only way to share the old family photos you’ve preserved.  One of my personal favorites is this family tree canvas.  It helps put names with faces in a simple and beautiful way.


Remember that once you've dated and digitized (scanned) these precious family photos, it's most important to now be able to SEE them! Whatever your method, be sure to display, preserve, and share these family treasures in a high-quality, meaningful way.  {Here are my recommendations.}

Save this post by Pinning, Tweeting, sharing on Facebook, Favoriting, or e-mailing!

This post was first published on July 21, 2017, at www.livegrowgive.org by Jennifer Wise.  
More #familyhistoryfriday posts can be found by clicking the hashtag next to Labels below.

Tuesday, July 18, 2017

How to Catch Up on Preserving Photos: the two-in-one plan

This post was updated 2022.

Back when we only took two rolls of 36 pictures each year, catching up on preserving them wasn't even a thing.  These days, though, we can take 36 pictures in a day.  And if they sit as jpeg files for weeks and months at a time...  Well.  You do the math.

If you do {make time} for memory-keeping and you get all the photos from 2010 preserved, that's fantastic and worth celebrating!  But while you were preserving those photos, you probably took just as many more.

So how on earth do we CATCH UP?  How do we make progress instead of just holding steady?

The answer?  THE TWO-IN-ONE PLAN!


First, choose one year's worth of photos to focus on.  If that alone is overwhelming, you probably want to sort your photos.  You may have EXTRA photos that are weighing you down, or you just may need to choose your favorites.  I wrote some tips and helps {at this article} for you if you need them.  Be realistic about how much time you have to preserve your photos and then plan accordingly.  If you can set aside 1 hour a week or 4 hours a month, then preserving 100 photos a week might not be the right move for you--you may need to choose your favorite 10.

Second, dedicate some time to preserving your photos and memories.  This is a really important step.  It's not just going to happen, even if you wish it would.  (To quote Dr. Phil, "How's that been workin' out for ya?")  If you need some help making time, click the "need TIME?" tab in red above.  There are some great articles and suggestions there for setting aside time for preserving your photos.

Third, follow the Two-in-One Plan.  It's pretty simple.  Once you've chosen which year's photos you are going to preserve first, and set aside enough time each week or month to do it, follow this plan:
  • month 1:  Preserve photos and memories from January and February.
  • month 2:  Preserve photos and memories from March and April.
  • month 3:  Preserve photos and memories from May and June.
  • month 4:  Preserve photos and memories from July and August.
  • month 5:  Preserve photos and memories from September and October.
  • month 6:  Preserve photos and memories from November and December.
  • repeat
See how that's two-in-one?  If you do the Two-in-One Plan for six months and then repeat with another year's worth of photos, you've preserved TWO YEARS' worth of photos in one year!  That's PROGRESS, my friend!

And that's the goal.

Find some great memory-keeping methods at the "how to get started" tab above.  There are some simple solutions that will make actually DOING the Two-in-One plan not just doable, but fun and even {addicting}!  It's pretty easy to be a successful memory-keeper when you have a system that keeps you coming back for more!  :)

Here's what that looks like on repeat:


UPDATE 2022:  You can see three of my favorite options in this video.  Each one is quite different from the other, so I think there's literally something for everyone!

The great thing about catching up on your photos is the momentum.  I can't stress this enough.  Interacting with your photos has been shown (in studies!) to increase happiness, increase relaxation, foster a stronger sense of self and connections with others, increase your perspective, increase your gratitude, and a whole host of other benefits.  So just start.  Accomplishing one goal will make an extraordinary difference because it will feel so good, and you'll want to keep doing it.


Heard someone complain recently about being behind on preserving their photos?  Share this Two-in-One Plan with her/him, or on social media using the tabs below.  

I love sharing doable solutions for memory-keeping with one more person every day.

Hooray!  This post was a featured post here:


Friday, July 14, 2017

Negatives, Old Photos, and Boxes, Oh My!

If that box of photos you have includes some old family photos, you may run into challenges identifying who is in those precious old photos.  One of my grandmothers consistently wrote on the back of photos–names, dates, places–so that they are easily identified every time.  Not all of us are so lucky!  So if it falls to YOU to be the identifier of the names, dates, and places, here are some helps.


Identifying who is in an old photo can have its challenges, but learning a few tools can help.  There are several great online resources to guide you as you try to identify old family photos.  I’ve listed three here for you, and each one has a link with much more information than the simple overview I’m listing here, so be sure to click around.


Maureen Taylor, {The Photo Detective}, has a lot of tips and resources, including:

·         how to date old family photographs, with hints on 19th century hairstyles and fashions
·         how to identify family photos
·         how to identify Civil War photos
{AncestralFindings} has some thorough information and steps about:
·         how to date old photographs
·         how to identify people in them
Here are 5 steps from {ThoughtCo} for help identifying people in old family photographs:
  1. identify the type of photograph
  2. identify the photographer
  3. look for clues in scenes and settings
  4. look for clues in hairstyles and clothing
  5. use your current knowledge as a resource

They’re Identified.  Now What?

First, write.  After identifying who is in the photo, write it down.  Your notations will be helpful to you as you look at the photo again in the future, but it obviously also helps other people who wouldn’t otherwise know who is in the picture.  When you write, include any necessary details, such as where you got your information or how you identified the person.  If you are guessing, be sure you write that as well.  If you use clues to guess at a date (such as hairstyles and clothing as mentioned earlier), give a date range and acknowledge your guess by writing something like “probably 1920s” or “around 1850-1860.”

Second, preserve.  It’s important to get this treasure out of the box where you found it.  It can’t stay there.  Although printed photos can last upwards of 200 years, the condition in which the photo is preserved strongly contributes to its longevity.  Photos should be protected from light and dust and heat using acid-free, lignin-free products.  (If you don’t know what that means, that’s okay.  Most products you can buy these days for preserving photos are that way.  If you’re using photo albums from the 70s or 80s, though…  Don’t.  Acids in the pages will eat up the photo!)

When you place your photo in an album, scrapbook, or digital storybook like the one shown aboveyou are not just preserving it, but you are creating a place where you can tell its story.  Writing on the back of photos like my grandmother did is a start (although, honestly, sometimes the pen made indentations on the front, and sometimes using the wrong kind of pen rubbed off onto other photos), but there’s a better way.  A photo needs a protective home where details can be preserved, too.  Whether you scan your photos and preserve them digitally as shown here, or you simply put your photos in a high-quality store-bought album, you’re prolonging their life!  You’re making them available to future generations, and you’re better able to enjoy them yourself right now.

A word about negatives and slides.

Like their digital file (jpeg) counterpart today, negatives are a {backup of the real thing}:  a photo.  Negatives and slides are a more recent development in photography, so you may not have as much trouble identifying people in them.  It will probably be easier for you to ask other family members for help in identifying people in slides and negatives because those lifetimes probably overlapped.  People still living will likely know who is in negatives and slides.

If you find yourself in possession of negatives, the first thing to do is figure out if these are photos you already have or not.  Hold them up to the light and see if they look familiar.  Next, decide if these are photos you want to have or not.  Print as needed.  Many photo developing places continue to print photos from negatives.  There is also an option to get a digital version of the photos on CD with the same order.  You can even just order a CD from the negatives if you prefer.  Once you’ve printed and preserved the photos from the negatives, store them like you would any other backup:  in a safe place away from the elements.
The more you can learn about the person in the photo, the more valuable it becomes.  Identifying a photo as “Barbara Smith, about 1890” makes a world of difference!  Putting the name with the face and connecting her to your family is an exciting, meaningful, important thing.  But finding out even more makes that person REAL.  Using websites like {familysearch.org} or {ancestry.com} might give you additional information, but it also might connect you with a distant cousin who may have more information than you do.

The work of identifying a family member in a photo and learning more about them is one of the most rewarding parts of family history, or just being a family.
"My ancestors not only passed down their physical traits to me and their other descendants but also their beliefs, hopes, dreams, and fears.  As I reflected on the human family, I realized we are all connected, all one family." -Valerie Atkisson
So find your connections.  Learn, write, and preserve.

Not all photo books are created equal.  To create heirloom-quality books like the ones shown here, learn more {right here}.

Pin this image to save and share on Pinterest,
or use the social media buttons on the left.

This post was originally published at www.livegrowgive.org on July 14, 2017, by Jennifer Wise.
More #familyhistoryfriday posts can be found by clicking the hashtag below next to Labels.

Hooray!  This post was a featured favorite here:

Tuesday, July 11, 2017

making time for memory-keeping with our quarterly online events

I've posted several ways to {make more time} for memory-keeping, but if you're serious about it, here's a great way to make your goal into reality.


I host a free online work event four times a year.  We "meet" over Zoom to work on whatever our photos need--uploading, organizing, putting in pages, etc.  And you can join from anywhere in the country!

It's really just a gift of TIME.  If you struggle to find time, you'll need to make it!  These are great opportunities to work on your memory-keeping goals and make some progress because these events GO ON YOUR CALENDAR!  That can be very helpful in making your goals into reality.

This work event is called Photo Rodeo: Rein in Your Photos.  

and you can find the next one (and the link to join) right here!

Definitely invite friends!  I'm passionate about helping people {turn files into real photos} and really make a difference since memory-keeping {creates connections within families}, {builds self-esteem in kids}, and even {lowers stress}.  

The four Photo Rodeos are seasonal--there's a Spring one around May, a Summer one around July, a Fall one around September, and a Winter one around February. 

Before your first Digi-Crop, you'll want to follow the instructions in the "how to get started" tab at the upper right here on this blog.  

Hope to see you there!  Let's change lives one photo at a time.

Friday, July 7, 2017

When Photo Overload Becomes Photo Overwhelm

This post was updated 2022.

Photographs.  Negatives.  Slides.  Digital Files.  Duplicates.  Some you’ve taken.  Some from Grandma’s boxes.  Some from… well, we’re not sure.  In the 1800s, photos were unique.  Even in the 1980s when photos were not unusual any more, they were manageable.  In the past couple of decades, though, the phrase “photo overload” has been rightly coined!  Many people now find themselves overloaded with photos in many forms and from many sources.  So what do you do when Photo Overload becomes Photo Overwhelm?

The goal is to stand on top of your mountain of photos, not be crushed under it.  


Here are four helps to get you out from under your mountain– and help you actually get to the top so you can plant a flag there:


  1. Find out what you have.  Organize chronologically by year and month.  (You can find several {organizational tips at this link}.)  Or {watch my photo organization tutorial videos here}.  Until things are sorted and organized, you won’t even know what you’re dealing with.  You need to know what you want to preserve and what is extra.
  2. Differentiate between the backup and the real thing.  What you’re going for is PHOTOS, hard copies that can be seen and interacted with and preserved with details and memories and stories.  Slides and negatives and digital files are not photos.  Not yet, anyway.  You probably remember this truth from the {“Why it’s Important to Print Your Photos”} post a few weeks ago:   Backups are to be STORED.  Photos are to be SEEN. 
  3. Preserve the photos and store the backups.  The great news is that once backups are safely stored, you don’t really have to think about them again!  Whether you are storing negatives or flash drives or photos in the cloud, they are there “just in case.”  Focus on the photos!  From those backup versions of your photos, take the things you and your family need to see again and again, the things that will bring back happy memories, the things that will strengthen relationships and bonds.  Print those.  Tell your {family stories}.  Share them, too!  There are lots of {creative ways to preserve and share pictures and family stories}!  Quite a few suggestions and solutions for the “preserve the photos” part of this step are right here on #familyhistoryfriday posts, so click around.  NOTE:  This is the only digital photo (and video) storage option out there where you actually BUY cloud storage instead of renting it, which means your photos are permanent.  They are actually guaranteed for your lifetime plus 100 years, with the expectation that you can pass on your photos and videos to another generation (or two!).  Other sites such as Google, Shutterfly, Dropbox, etc., have fine print that reserve rights to access (or even sell) your photos and rights to change their policies at any time ("with or without notice," Shutterfly's says).  If you missed what I call the Great Shutterfly Debacle of 2023, you can read a little about it there. 
  4. Don’t be afraid to part with something.  If you have 12 photos of your grandfather, you need all those photos.  If you have 120 photos of your child’s field trip, you’re going to have to be okay with not printing them all if you want to stand on top of your mountain.  Decide which ones stay in digital form and stored (or deleted, if you’re a person who can do that) and which ones get preserved in albums, scrapbooks, or {digital memory and photo books}.  You don’t need to keep blurry photos or photos in which the subject’s eyes are closed unless they are the only ones you have.  Parting with photos that aren’t your favorites anyway is just fine–  I promise!
Each photo you have, whether digital or printed, needs two things:  1- a hard copy preserved with written details and story, and 2- a digital backup stored.  Beyond this (such as duplicate copies or blurry photos), we will call EXTRA.


To get on top of your mountain, you really need to start with deciding what exactly is EXTRA.  Start by sorting.  Find duplicates from 35mm film days, find less-than-fantastic pictures (blurry or dark, for example).  Do this with digital photos, too.  Find which of the 300 pictures you took at the beach are your very favorites.

Ask yourself what benefit each of those EXTRA photos has to you or would have to someone else.  You will need to decide the benefit and value of each photo based on your own criteria.  Photos in which someone’s eyes are closed, for example, can be valuable if there isn’t another photo from that time period or if it’s one of the few photos you have of that person.  Otherwise, maybe not.
EXTRA photos from the 35mm days might mean duplicates.  EXTRA photos from digital days might mean 200 photos from one event that could be condensed into 30 or 50.  Or even 5 or 100.  For now, just keep these photos as EXTRA.  Label them.  But sort them away from the most important photos.  This is just streamlining– a simple reduction in the amount of photos you have to deal with.  Set aside the EXTRA.

By the way, a common misunderstanding about cloud "backup" of your photos is that it is a backup.  In reality, many cloud storage options are actually a sync, not a backup.  Here's the difference and why it matters SO MUCH!

A little about scanned photos:

If you are digitizing (scanning) photos, you’re creating for yourself a second copy (or version) of that photo.  If photos are in bad shape, {scanning} creates a digital backup from which you can get a new hard copy.  Just remember that scanning photos to preserve them digitally isn’t the only goal.  First and foremost, be sure you are focused on a having hard copy of some kind.  That’s the real goal because being able to SEE photos is what makes them important.  Preserve photos in an album or book and then store the other (digital) version.


Keep in mind that because technology changes so quickly, experts recommend that you store your photos {digitally in two ways}, not just one.  That means storing them on a CD, flash drive, external hard drive, or in the cloud is great, but you never know when technology will be outdated, files will become unreadable, or an online photo storage company will go out of business.  So two methods of digital storage is safest.

You may end up with additional EXTRA photos when you have them scanned.
Here are some suggestions on what to do with those Extra photos.

Once you’ve discovered the EXTRA photos, whether digital or physical, and have set them aside, focus first on preserving hard copies in a book, and next on storing digital (or negative) versions as backup.  Now you’ll be sure that your extra photos are really extras!
  • For truly worthless photos, throw them away–right now.  I’m talking about those accidental ones of somebody’s finger or the ground.  Get rid of photos like that ASAP.  They’re just in your way.  These is the fast track to getting on top of your mountain of photos.
  • You may have some special photos that you don’t really need any more since they’ve been scanned or otherwise preserved but you don’t really want to throw them away, either.  An example of a photo in this category would be an original photo of Grandma & Grandpa on their wedding day.  Once you’ve scanned it, printed it to preserve in an album or {family storybook}, and preserved it digitally, that original has become EXTRA– but you don’t want to throw it away!  I highly recommend passing photos like this on to someone else— a sibling, a child, a cousin.  Let them enjoy and appreciate this heirloom and bit of family history like you have, especially now that you don’t have to worry so much about something happening to it. 
  • If you don’t want to throw away photos, that’s fine.  Just know that you’re going to need to find a way to store them.  If that means bins of physical photos, or if you want to store a terabyte of digital photos, that is perfectly fine.  But just don’t forget that storing isn’t seeing.  Make sure you’ve chosen your favorites to print, see, and love.
If you have a lot of digital photos that you’ve taken yourself, sorting them and finding EXTRAS is absolutely vital to you being able to get on top of your mountain!

Let me give you a little perspective.

I talk to a lot of people about their photos these days, and I find it interesting how many of them don’t ever even SEE their photos because they have too many to do anything with.  Many are just left in digital form on a computer or in the cloud and not ever looked at again.  Yet in the same breath they tell me they can’t possibly part with any of their 500,000 photos, so paring down is not an option.
I’m very sentimental, so I understand the difficulty of parting with a photo, but realistically, they have to make their choice:  either they keep every photo and stay under their mountain of photos and likely never see any of those photos they took because they’re so overwhelmed, or they have to pick and choose their favorites to print, preserve, and store.  Think about it:  if they’re never going to see any of those great images, it doesn’t make that much sense that they’re so protective of them.   They’re kind of thrown away already.


So be brave.  Sort.  Find the extras.  Removing them is like taking rocks off your mountain and lowering its elevation.  And by all means, focus on your favorite photos!  

Remember that the goal is to SEE them, not just to store them.  Choose a high-quality way to preserve them so you can see and enjoy them for years and years to come.  Here are some steps to {get started}.

Know someone else who is suffering from Photo Overwhelm?  Share this post on social media.

This post was first published on July 7, 2017, at www.livegrowgive.org by Jennifer Wise.  You can find more #familyhistoryfriday posts in this series by clicking the hashtag next to Labels below.


Hooray!  This post was a featured favorite here: