Friday, December 29, 2023

Crafting with Digital Pages and Creative Software

One of my all-time favorite discoveries about digital scrapbooking was that it can be used for so much more than digital scrapbooking!

Yes, preserving my photos matters so much, and preserving them with my memories has many benefits that are good for my heart and soul.

And, yes, in fact I actually need the therapeutic process of sitting down with my photos and memories and putting them together.  (Here's why.)

And digital scrapbooking is so convenient for this:

individual scrap pages unbound (thick like cardstock)

a digital scrapbook with bound, lighter-weight pages

But when I discovered that individual digital scrapbook pages can be used for all sorts of things, from gifts and home decor to party favors and banners, a whole new world opened up!  The thick, glossy paper works beautifully for so many things.

And that's when--many years ago--you started seeing this type of creativity with tutorials here at the blog:

framed scrapbook page to use with a
dry-erase marker to count down days

personalized bookmarks made from a scrapbook page

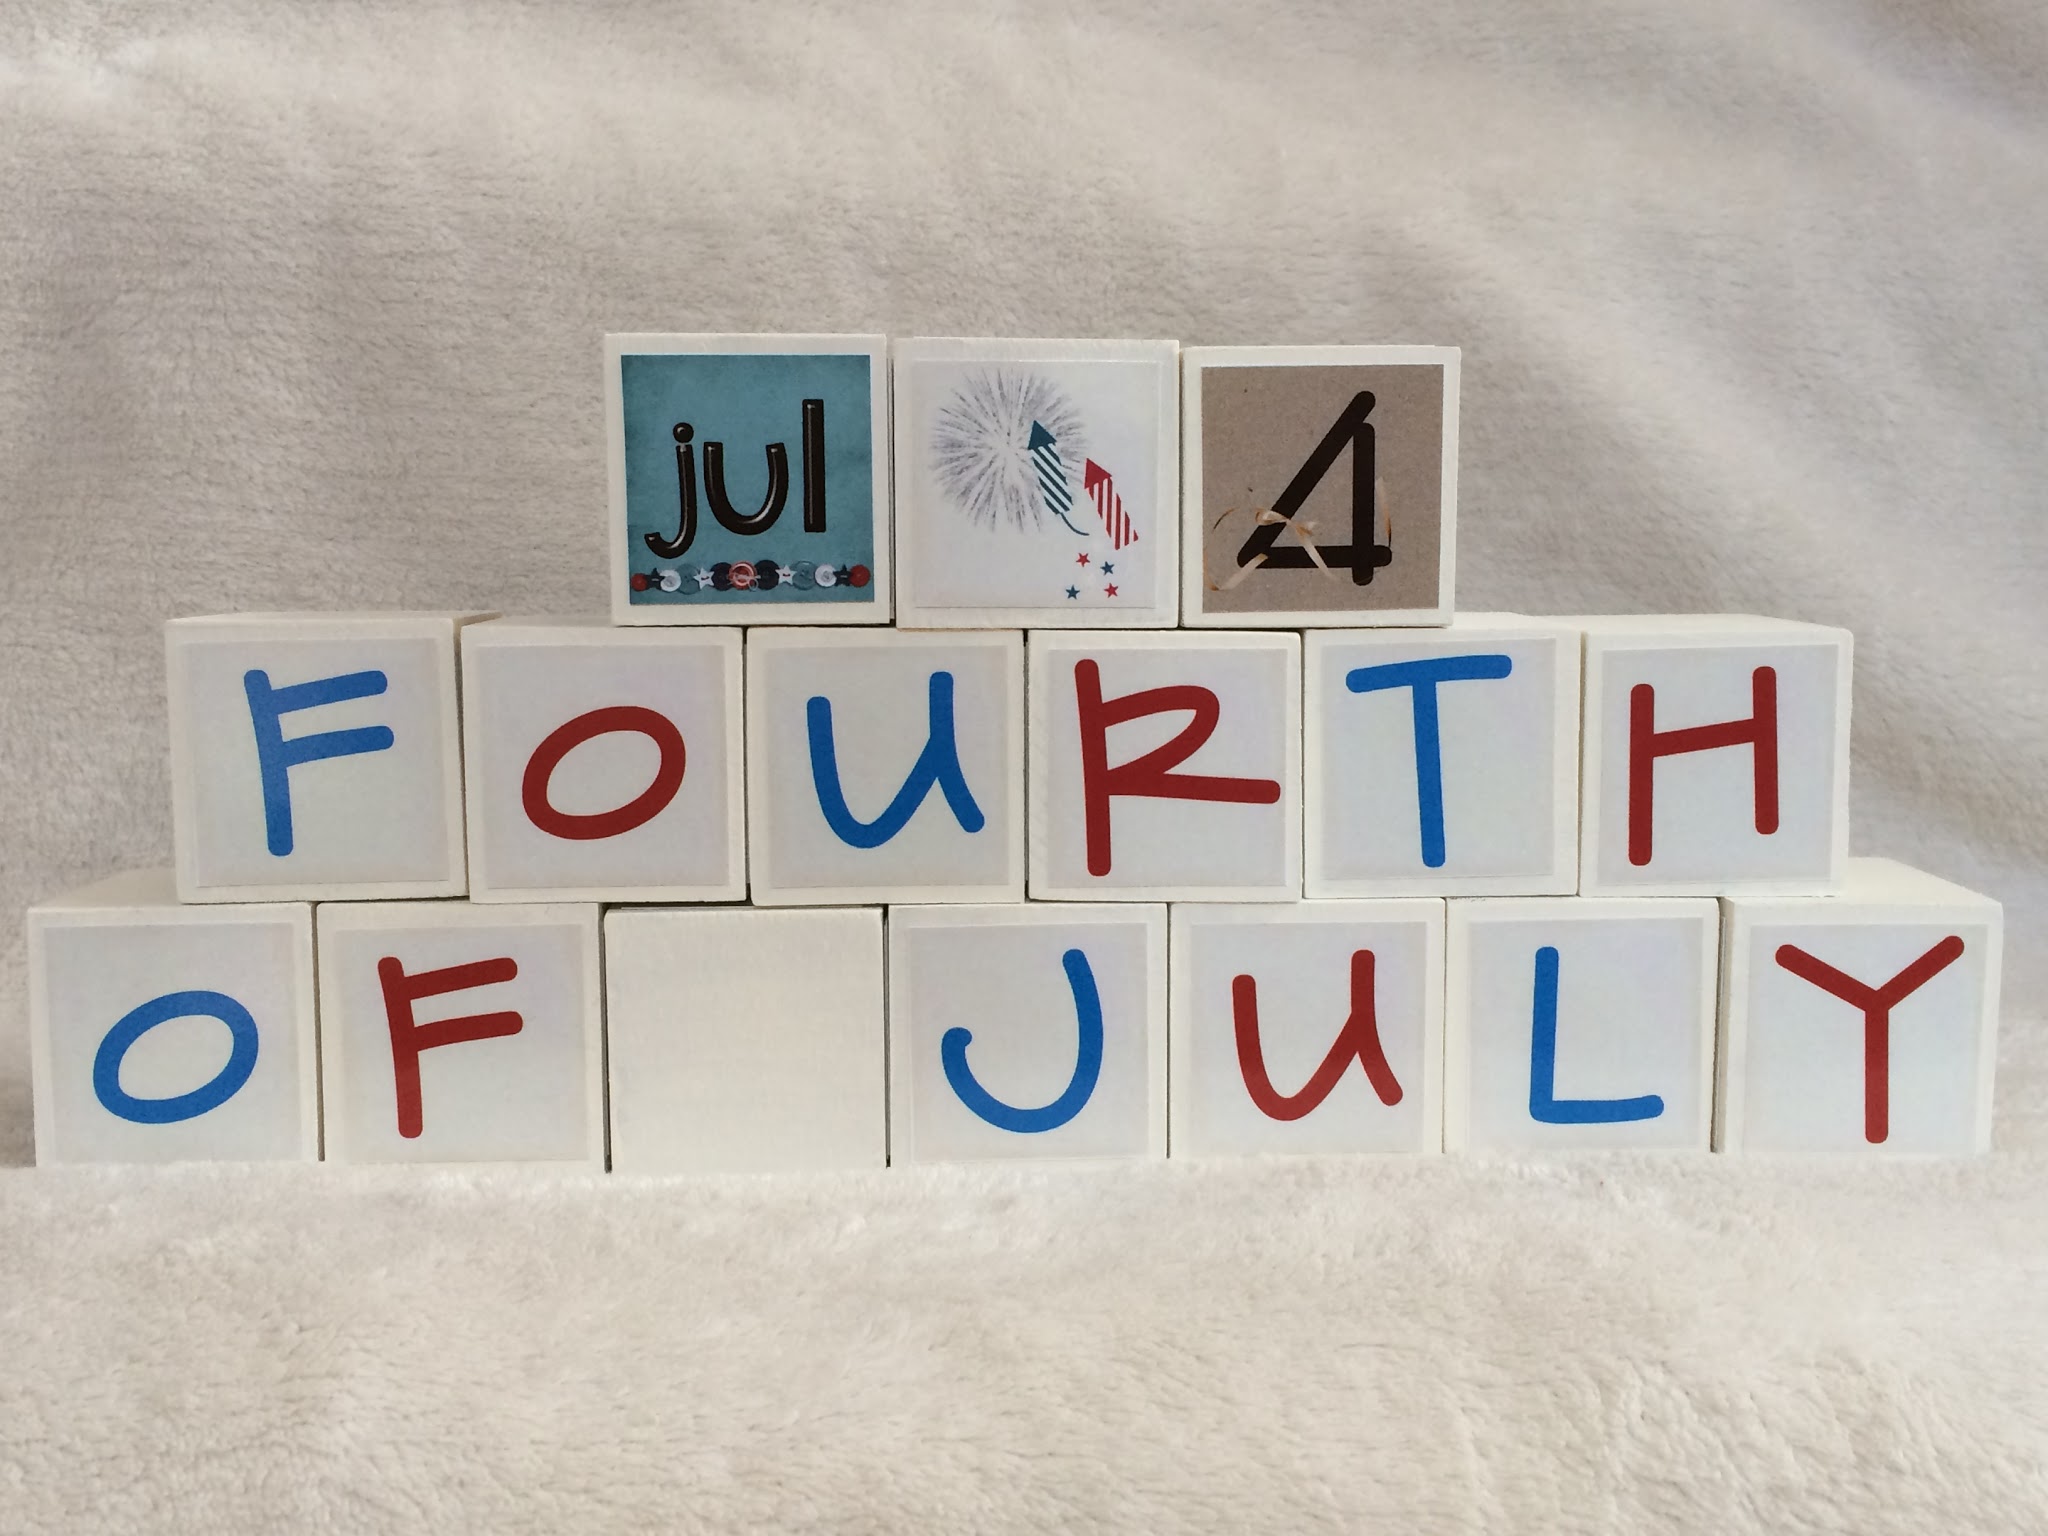
perpetual calendar and holiday blocks made from digital scrap pages
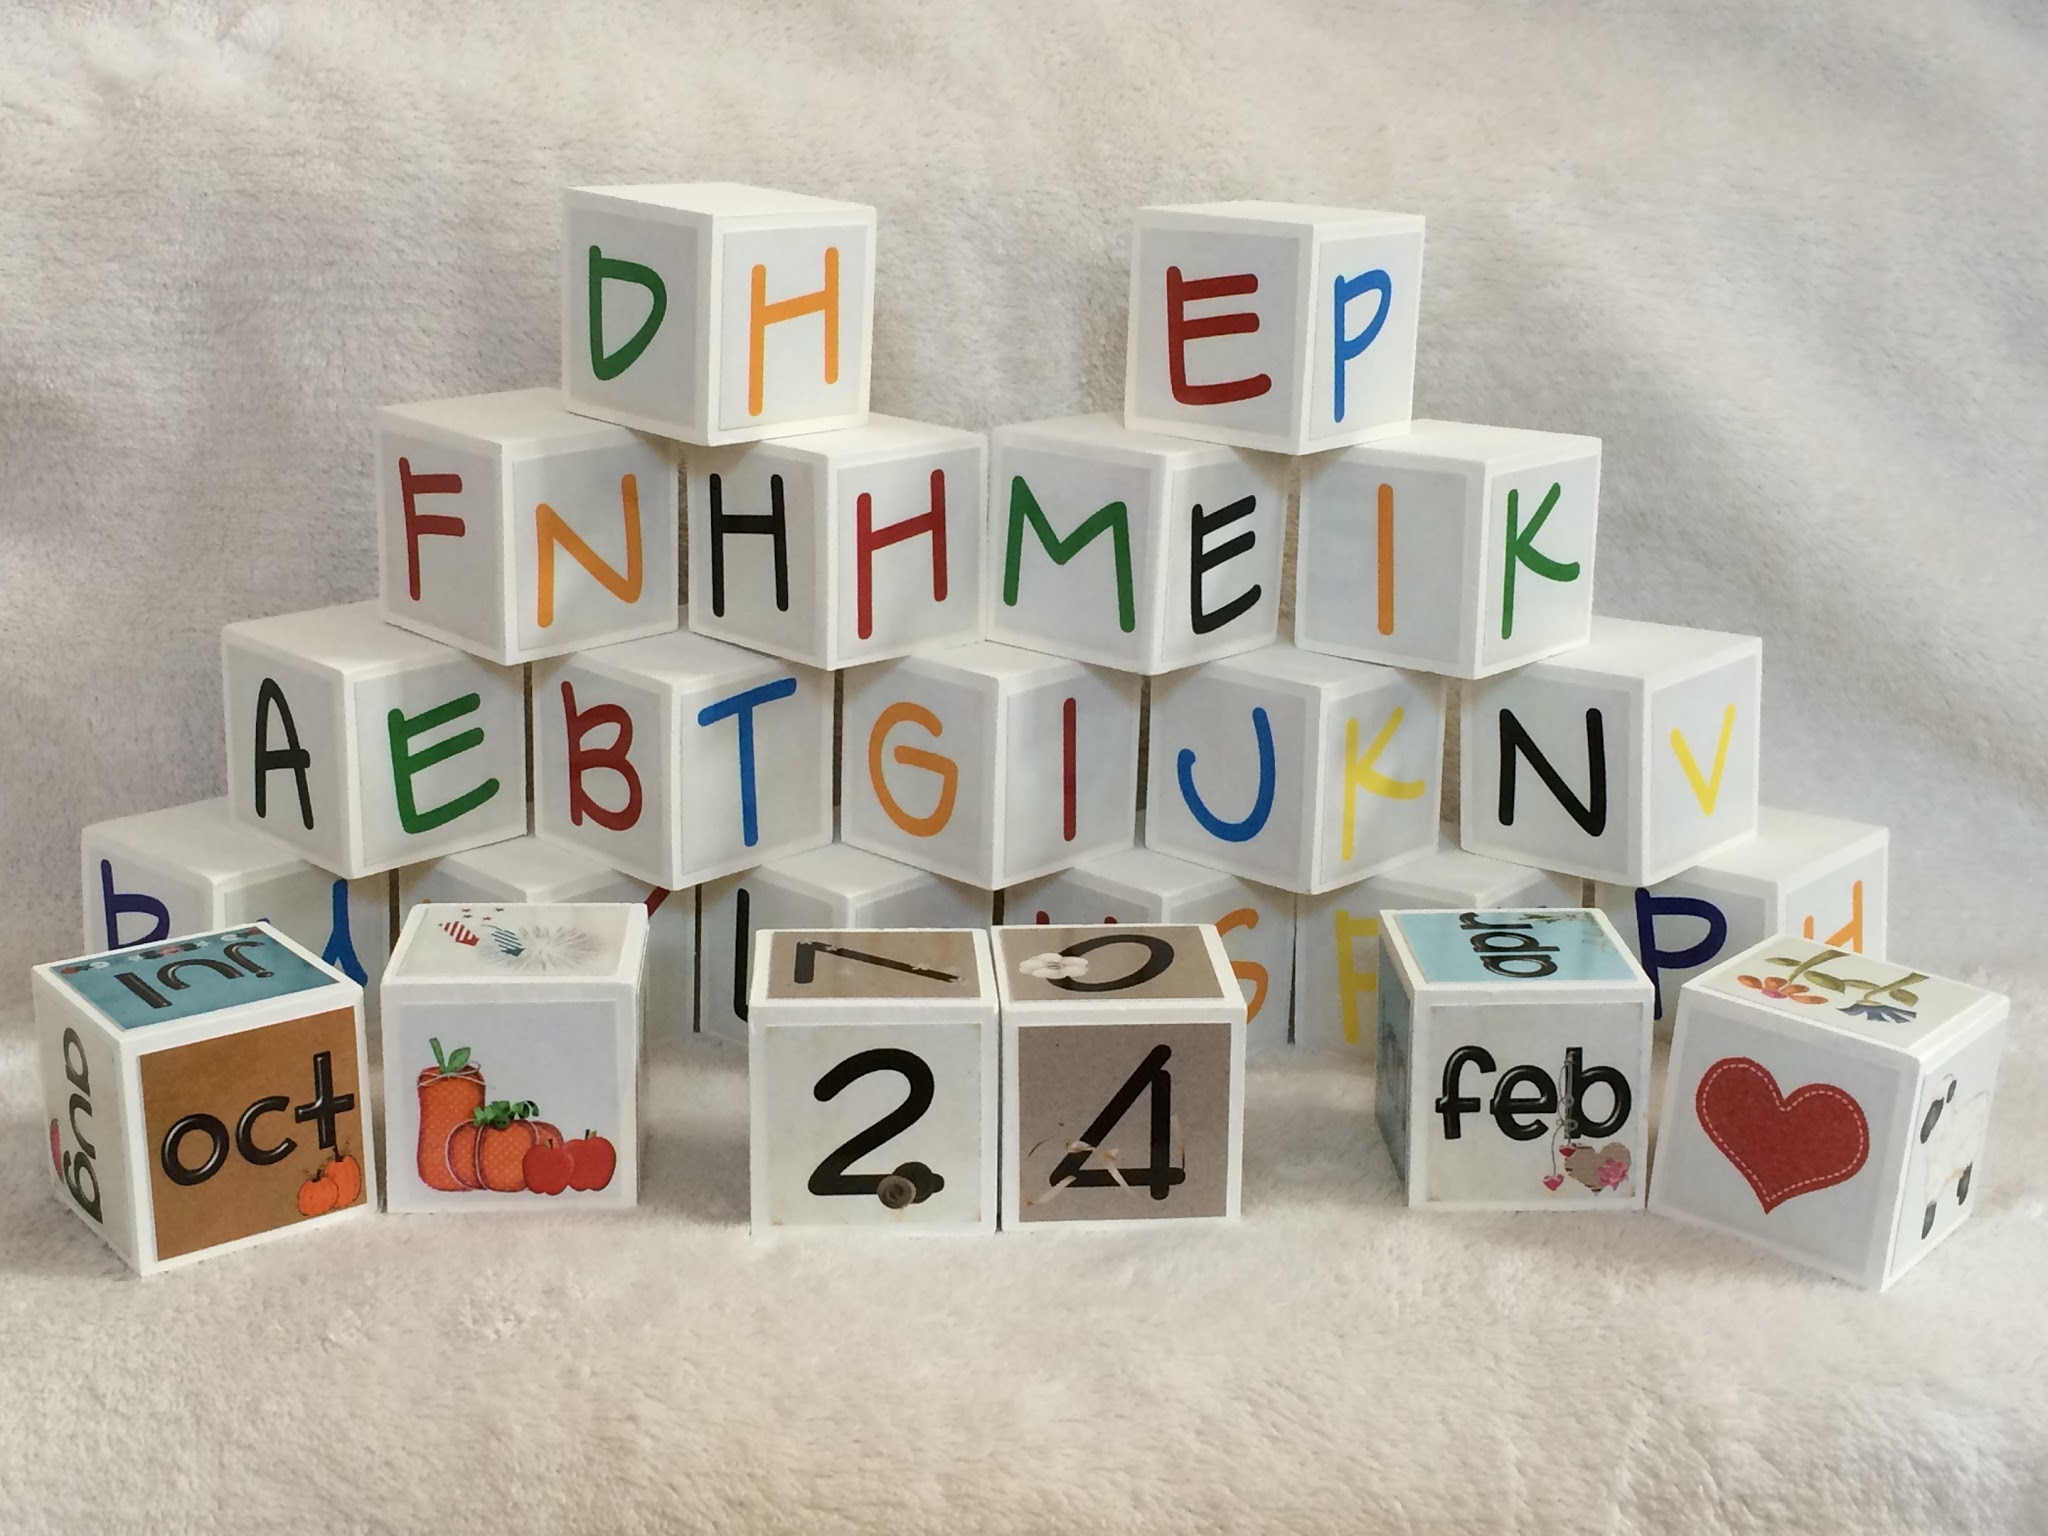
(the whole set of perpetual calendar and holiday blocks)

magnetic countdown to Halloween
photo credit: Mary Beth Lovejoy

personalized graduation congratulations banner in school colors
made from 4 12x12 scrap pages

cute gift idea--cut out and wrap around a candle

silhouette nativity blocks made from a scrap page

I don't need to tell you how much creative fun I had crafting from digital scrap pages (for years and years!).  They made unique gifts and home decor and were so much fun to give away!

And Then I Had to Pivot

I was pretty happy doing this for 12 or 14 years.  The company I'd been using for my digital scrapbooking also had some really fun products I could get creative with, like address labels.  As it turns out, these address labels fit perfectly around a Hershey Nugget!


And the larger labels could be cut in half to fit around lip balm!

All of this was great until the company had some major technical issues and had to re-design the software (thanks in large part to Adobe discontinuing Flash) and eventually stopped offering this type of creative design under new management.

In the meantime, I had been introduced to Forever, which I loved for 3 reasons:

  1. the quality of the books and other products created using not one but three different ways to make them ("easy button," professionally-designed templates, and creative digital scrapbooking) and then professionally published
  2. the permanent, private, secure digital photo and video storage I had not seen offered anywhere else (no monthly fees and lots of other perks)
  3. the best digitizing service (as verified by Trustpilot, actually) where I could get all my VHS tapes digitized, old slides digitized, old photos scanned, etc. 
Pivoting my digital scrapbooking and photo storage was easy because Forever is everything I could ever want for my memories.  

But it took a little time and quite a bit of thinking about how I could continuing to craft with digital scrapbook pages with a new software program and different products.

NOTE:  I am a Forever affiliate (a decision I made because I love it so much), so you will find affiliate links in this post, from which I earn a commission if you make a purchase, at no extra cost to you.

How to Craft with Digital Scrap Pages using Artisan

Forever's digital scrapbooking software, Artisan, is pretty astonishing, to be honest.  There is SO MUCH you can do with it.  I've been using it for over 2 years, and I know I'm just scratching the surface.  (The Artisan pros at Pixels2Pages know it all and teach something new all the time!)

I'm so thrilled with what I've been able to do, crafting with digital scrap pages using Artisan software.

So, I've made two videos to show you how to craft with digital scrap pages using Artisan.  

This first video is for things like the blocks, bookmarks, and banners I showed you at first.  These are best printed at the Forever print shop with their professional papers and inks.  The thick glossy paper is just perfect for things like this.  You basically create something, then cut it out or frame it.

Here are two things I've made recently as digital scrap pages (available in 12x12, 8.5x11, or 8x8)  using Artisan and then printed professionally with Forever.

gift tags I made in Artisan from an 8x8 scrap page

In fact, if you click that image, it will open in your (free) Forever account and you can actually save this project to your Forever account and then have it printed without having to do a thing!  Just click the "copy to my library" button above the image.

Same with this birthday banner--just click it to save to your Forever account and print.  Assembly directions included.


birthday banner made from 3 12x12 scrap pages

This second video is for use on projects that you prefer to print at home instead of on the professional, thick, glossy paper in sizes of your choosing.  This method is only for use with 8.5x11 scrap pages so you can print them at home, but they are great for two things especially: 1- printing on thin (regular printer) paper and 2- printing on sticker paper (such as Avery 8165). 

It's how I now make my own stickers like the candy wrap labels for the Hershey Nuggets I showed you before.  I print my Artisan-designed pieces on a page of sticker paper, then wrap them around the chocolates.  Super easy! 


This is a cool way to gift them, too--cut a piece of card stock, tape the wrapped chocolates on, then slide into a pretzel treat bag!

I could do stickers for lip balms (or anything else I might dream up) as well!  

This is a new style I tried for our Halloween Harry Potter party this year.  I wanted to try printing on regular printer paper (thin) so it would easily bend around a candy bar, and I wanted to try snack size candy bars, which I've never done before.  The first go wasn't quite big enough, so I made an adjustment, and now I daresay it's perfect.  :)   It turned out great!  


Again, you can click these image to download it--this one is different from the others I've shared with you because it's not a project, it's just a PNG (image) file.  Once you open it in Forever where I have it saved, you should click the "download" button you see along the top.  You'll save it to your computer and print from there (on your printer). 

Note that only projects are printable with Forever, but you can save images like this one above and PDF files in your Forever Storage, too, along with photos, videos, etc.

I'm not sure how Blogger will do for quality, so if either the Joy to the World stickers or the Harry Potter wraps don't save at high resolution from here on Blogger, please email me at photoandstorytreasures@gmail.com and I'll email you the full-quality images.

Get Creative!  (with a Fun Challenge)

Artisan digital scrapbooking software is so fantastic for digital scrapbookers.  (If you don't have Artisan yet, there's a 30-day free trial of it here.)  


But it's also so much fun for parties, home decor, gifts, and more!

Here's the challenge:  Find an old "crafting digitally" project that I have posted here at the blog previously.  Following the directions using the video(s) posted above, create your own Artisan design using a Forever scrap page.  Then email me a picture of your completed design at photoandstorytreasures@gmail.com to show off.  :)  Let me know if I can use your photo with props to you here at the blog, too!  (Totally optional!)
 
Use the "DIY and crafts" labels to find old posts, or click on one of these options:
I can't wait to see what you do!  
 
Save and share this fun idea to Pinterest by Pinning this image, or
use the social media share buttons at the left to share on Facebook, Twitter, etc.

Follow Photo & Story Treasures on social media here:


Friday, December 8, 2023

How to Install New Fonts on Your Computer and use them with Artisan Software

I'm a Font Girl.  I love playing with fonts and getting just the right look on whatever I create.  Today I'm going to show you how to have a lot of fun with new fonts.

Because getting the right font makes whatever you're creating perfect!

First, let's look at how to download and install fonts to your computer, and then touch quickly on how to use the fonts in Artisan specifically, like I did with this Irish/Gaelic font when I made this gorgeous blanket from Forever using Artisan:


Times New Roman or Comic Sans would just not have been the same here.  Right?

Artisan by Forever is an amazing digital scrapbooking software program I've been in love with since 2021.  Of course, you can create more than "just" digital scrapbooks with Artisan (and have them professionally published by Forever)--like the blanket you just saw, plus mugs and ornaments and wall canvases and calendars and all sorts of things.

But let's start with fonts.

Where To Find Fonts 

Search the internet for a font on a reputable website.  You can certainly buy fonts to install on your computer, but I'm an enormous fan of 1001 Free FontsFree is right up my alley, but I love the variety of fonts there, too, from Harry Potter and Disney fonts to lovely script and handwriting fonts.  

I found this cute Christmas one there when I wanted to make headings for my digital scrapbook pages about our anniversary trip to Christmas markets in Europe.


DaFont is another reputable free font website.

How to Download and Install Fonts 

I'll walk you through my process with 1001FreeFonts, and I use a PC.  Make any personal or Mac adjustments as needed.

STEP 1:  I peruse the fonts, either by theme or just by scrolling down to see what's new.  Once I find one I like, I click on the name of the font.  This opens all the letters, numbers, and characters that the font includes.  I like knowing, for example, if a font doesn't have an apostrophe or parenthesis or something.  Or sometimes one of the letters is designed in a way I don't like, in which case I keep searching.  There are so many to choose from--you can definitely be picky.

STEP 2:  Once I am satisfied with everything in the font, I click the black DOWNLOAD button.  I am downloading a .zip file.  I personally have set up a folder on my computer called Fonts, so all my new fonts go there.  Note, too, that there is information listed about the font--the free ones are for personal use only, and there is sometimes a donation option for the creator of the font.  

STEP 3:  Find the location of your download (for me it's the Fonts folder, but yours could be in Downloads).  Right-click the .zip folder and select "Extract All..."  You'll have the option of putting your extracted files in another location (if you want to do this, select "Browse"), or you can just click the "Extract" button.  This will create an extracted folder so you can access what's in it.

STEP 4:  Open the extracted folder by double-clicking on it.  The extracted folder will have the same name as your font.  As you can see above, my font was called Violet, so my extracted folder was called "violet".  Once you open the first folder, you may have another folder to open after that.  Different fonts are different--just keep opening folders until you see files.  You should eventually see a .ttf (or sometimes .ttc --both stand for True Type) file, but there will probably be other files as well (don't worry about them).  

STEP 5:  Right-click the .ttf file and select "Install."  (Be sure to read the note below about file types.)  The installation process will begin.

NOTE ON FILE TYPES:  True Type (.ttf or .ttc) files are easy to install and work on both Mac and Windows.  Open Type files (.otf) are similar.  If you come across a PostScript file (.pfb or .pfm), it is a more complicated process requiring two separate files to install.  The good news is that these are older file types, so they are not normally found at common font websites like  https://www.1001freefonts.com/ or https://www.dafont.com/ these days. 

And that's it!  Once your font is installed, you can use it in any program on your computer (Word, etc.), or in an Artisan project!

books in several sizes; hardbound or softbound

calendars in 4 sizes

cards and invitations; I used these cards to make recipe cards!

NOTE:  I am a Forever affiliate (a decision I made because I love it so much), so you will find affiliate links in this post, from which I earn a commission if you make a purchase, at no extra cost to you.

About Fonts in Artisan 

The main thing to know here is that because Artisan is a computer-based program (like Word or any other program you download to your computer), you can access fonts installed on your computer from Artisan.  Artisan is made for a PC (Apple loves being special, if you haven't already heard), but can run on a Mac using a partitioning program.

It is so much fun to be able to pick just the right font for any Artisan project I'm working on, from western-style and typewriter-style fonts to Easter and Halloween fonts! 

New to Artisan?  Click here to see me make a basic page, then click here for a 30-day free trial.

Here's how you create text boxes and change fonts when creating in Artisan.  Watch in the video for the "insert symbol" link right below where I typed "Hello and welcome to Artisan Quick Tips with Jennifer."  That's where you can add symbols like the umlaut you see over the U in Zurich (above) or an ñ!!

Here's another really fun thing you can do with cool fonts in Artisan--you can fill them with digital papers!


Isn't that fun?!  The possibilities are endless.

What are you going to do with your new fonts?  Tell me in the comments below!

Save and share this article by Pinning this image to Pinterest or sharing on 
Facebook, LinkedIn, Twitter, etc., using the share buttons at the left.

Follow Photo & Story Treasures on social media here:
  

Hooray!  This post was a featured favorite here:

Saturday, November 11, 2023

Your Curated Holiday Reading List for our 14th Blogiversary

Today's our birthday!  LifeTales Books is celebrating 14 years of blogging about photos, memories, family connections, stories, and more (including some time management and self-care/wellness)!  Woo hoo!

We're going to celebrate with a comfy reading list for you!  Enjoy it today or on an upcoming holiday, complete with a blanket and something warm to drink.

This reading list is made up of the top 3 most-read posts at the blog since last November, and the most popular article ever posted here!  Cozy up and click the blue links to read & enjoy. 

TOP 3 POSTS SINCE OUR LAST BLOGIVERSARY (2022)

The third-most popular post over the last year is an eye-opener for most people!  If you missed it in May, don't miss it now!

Why You Actually Want to Buy Digital Photo Storage (with a pro tip)

Coming in at #2, we have one of the funnest posts I've ever written, in part because it's an awesome life hack, and in part because it's a dreamy travelogue:

How to Safeguard Photos While Traveling (ft. Favorite European Christmas Markets Itinerary)

And the most popular post here since our last blogiversary is:

Conquer Your Photos Workshop (with video recordings)

(Which, frankly, doesn't surprise me because there is SO. MUCH. useful and helpful information there!  Life changing.  Really.)

You're probably ready to cozy up and read, but don't forget--there's one more post on our blogiversary reading list!

AND NOW, THE TOP POST OF ALL TIME (*drumroll*)

For the bonus part of your holiday reading list, here's the most popular post since 2009 when this little blog was born:

How to Create Photo and Story Treasures

Happy reading and happy holidays!  


Don't forget to Pin, share, and comment on any article you particularly enjoy.  Happy holidays!  Make lots of memories, take lots of pictures, and then preserve them both.


Follow Photo & Story Treasures on social media here:
  

Hooray!  This blog post was a featured favorite here: