I am really excited about this latest DIY project I've made using Heritage Makers prints. As you've seen from other DIY tutorials I've posted, I've only used Heritage Makers scrap pages for my crafting. This one is bigger than anything else I've made before, and this is actually made from a POSTER! (Well, half a poster anyway.)
Look how cute!!! (despite the terrible lighting)
I know the photo isn't great, but this is a birthday/anniversary board (I've called it "FAMILY special days" on the poster), and then there are little wooden pieces with names and dates that are hanging below the corresponding birthday/anniversary months. I made this one for my mom for Mother's Day, but when my daughter came home from school and saw it, she was really disappointed that we're not keeping it... So I think I'm making another one.
Wanna join me?!? Let me show you....
Total cost for this board is probably $23-$28, depending on how many "danglies" (you know--the pieces that dangle) you have for your family. BTW, you will most likely spend more than this in getting the supplies, only because in some cases you use only part of the larger package that you need to buy, but it will come out to about $23-$28 for supplies actually used. (Which is why you might as well make two! And the Heritage Makers poster actually comes with two on it! So why not?! Keep one, give one away!)
2023 UPDATE: Heritage Makers became YPhoto under Youngevity (which purchased Heritage Makers in 2013). YPhoto uses only templates, so the creativity showcased here is no longer available there. Best-in-the-industry quality and permanent cloud photo storage with guaranteed privacy are required for anything recommended here by Photo & Story Treasures, so we highly recommend Forever.
SUPPLIES:
- this Heritage Makers poster This is not in the template gallery like the other crafts I've made--this one is in my personal account, which I can then transfer to anyone else with a Heritage Makers account (which is free).
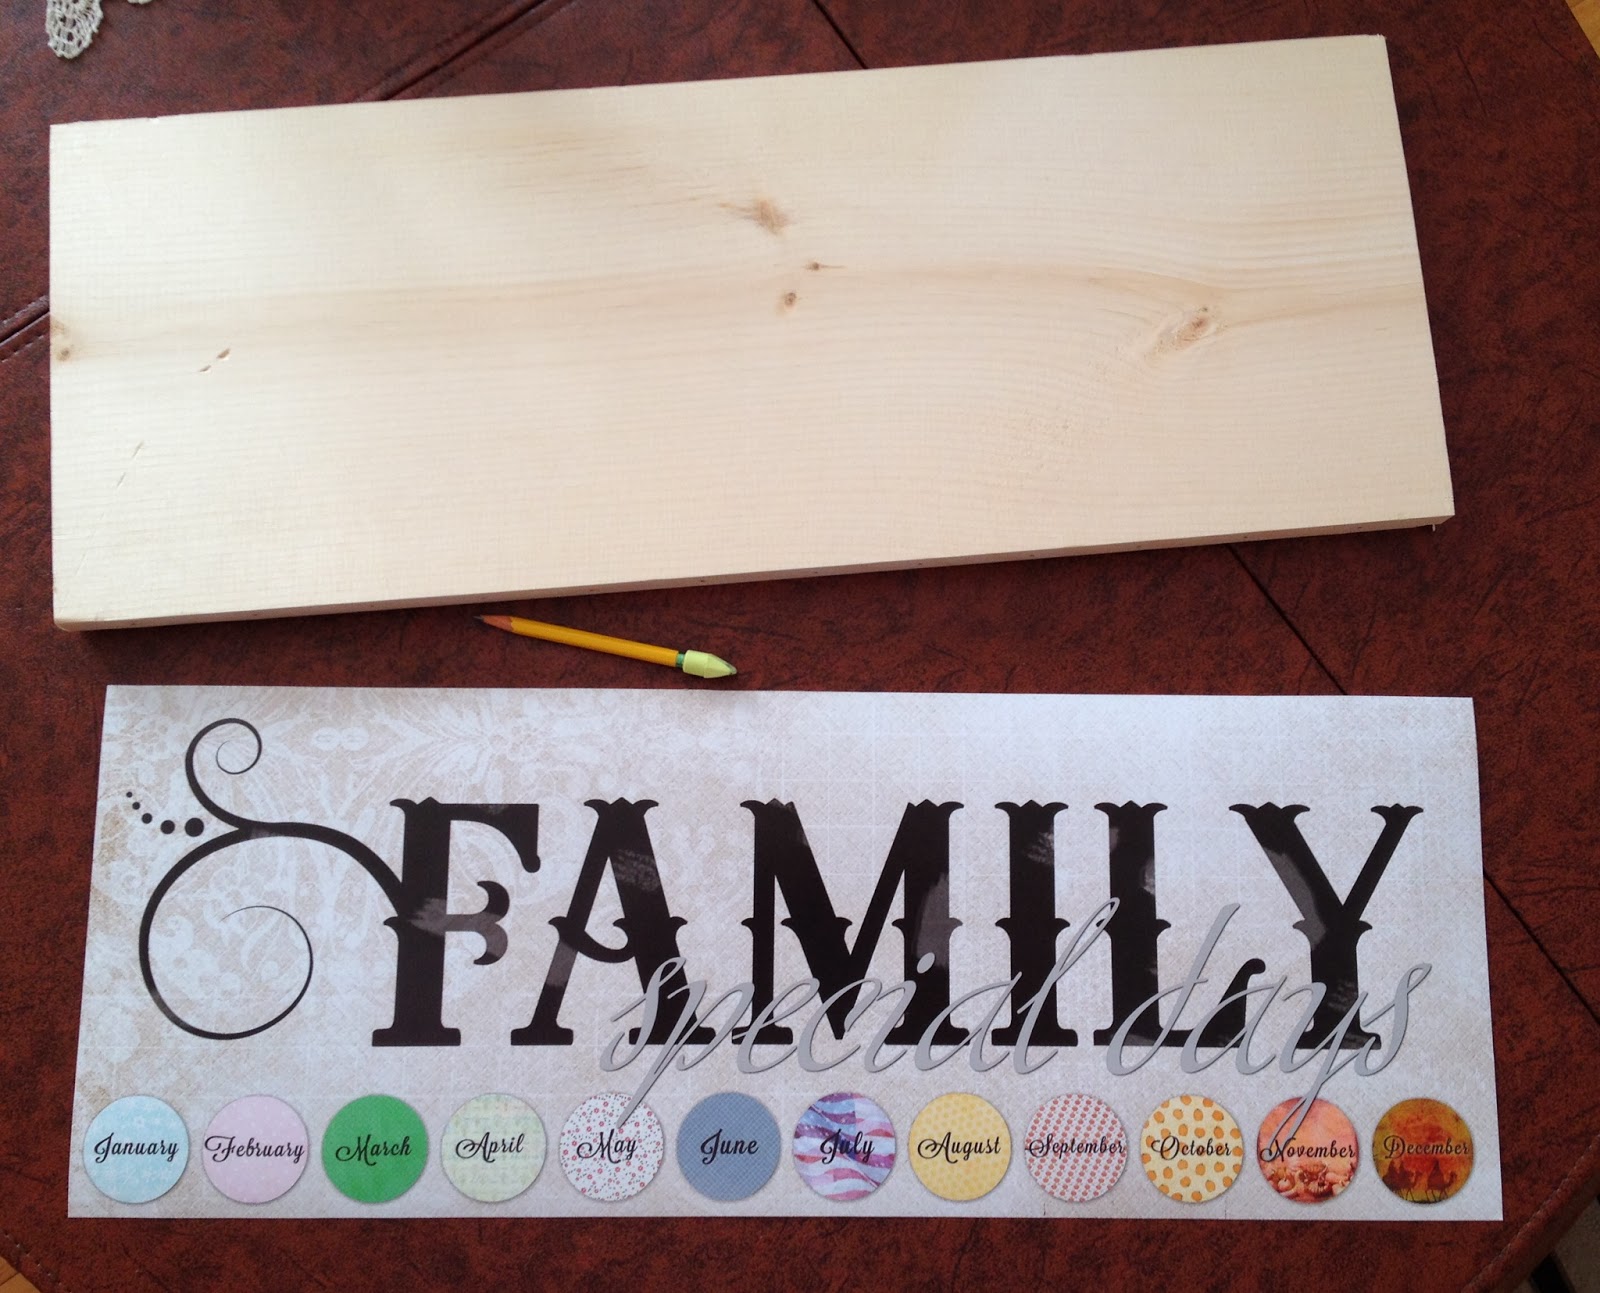
- This is an 18x24 poster, so each print (poster) will have TWO pieces for your board that look like this:
- 24 1/4 inches of a 1"x10" board So if you go to your local home improvement store, look for nice boards that are 1"x10". The crazy thing is that even though they are sold as 10", they only truly measure 9 1/4. They will come in 6 ft., 8 ft., 10 ft., or 12 ft. lengths. You only need slightly over 2 feet (24 1/4 inches, to be precise). I made these poster prints to fit the 9 1/4" wood, so just cut a 24 1/4" piece off the long board, and you're good to go.
- Power saw to cut your board, OR lovely person at the home improvement store to cut your board for you. The finished product should be 24 1/4 inches by 9 1/4 inches (which is what the 10" boards really measure, remember) and about 1" deep (or whatever it really measures)
- Paint of your choice. I did white, but light brown would be good. Or you could stain it. Look at your print when you get it and see what you think matches best.
- 12 1/2" cup hooks to go under each month. At a home improvement store.
- Power drill with a 1/16" drill bit.
- Several 1 1/2" pieces of wood--hearts for anniversaries and circles for birthdays. These can be purchased at your local craft store, or online. You'll need one for each person and couple in the family.
- 7mm jump rings All right, I had no idea what these were. These are used for making jewelry. You can buy these at your local craft store, too. I got a pack of 144 for $3. You will need roughly 4 of them PER circle/heart.
- small needle-nosed pliers to open and close the jump rings (2 pair if you want life to be easier)
- 1 self-leveling picture hanger I've also seen them called sawtooth hangers. At home improvement or craft stores in the framing section. These usually come in a package of 3.
STEP 1
Order your beautiful print from Heritage Makers. Email me at photoandstorytreasures@gmail.com if you need some instructions on how to do that. (Or, as I mentioned previously, I can always just order it for you if you want.)
STEP 2
Cut.
Since your Heritage Makers print will come with two of these things that say "family: special days," you will need to cut them out. (Gifts for a mother AND a mother-in-law for Mother's Day!) Your print will measure 9 inches high and 24 inches wide. Cut your 10" board (which, again, truly measures 9 1/4") to be 24 1/4" long. This will allow you to leave a tiny edge around the "family" print once it's matted on the board.
STEP 3
Measure and mark.
Stick a small piece of tape to hold your print onto your board. Carefully mark on the side of your board, placing a dot underneath each of the 12 months, right in the center of the board. (See my little pencil dots?)
STEP 4
Drill board for hooks.
Using a 1/16" drill bit (it's at the far right in the case--tiniest one), drill holes where you marked dots on the edge of your board. They don't have to be all that deep. See my drilled holes, plus the dot on the far left that hasn't been drilled yet.
STEP 5
Sand, then paint.
First, just sand any rough edges on your board. Mine didn't have a lot. I did sand a little where I'd just drilled the holes, but not that much. For me, the sanding took about 24 seconds.
Then paint. I chose white. Since the print would cover most of my wood, I only painted around the edges. I also painted the four 1" sides of the wood, and I opted not to paint the back, but you certainly could. I use craft paint (acrylic) found at craft stores for about $1 or less. You don't use much paint with this project, either. While you're letting it dry...
STEP 6
Prepare the "danglies" (you know, the things that dangle)
Open your packages of 1 1/2" circles and hearts. Get enough circles for each family member's birthday, and enough hearts for each anniversary. (You could also do JUST birthdays, or you could do all circles or all hearts.) Draw a straight line down the MIDDLE of the circle. These circles by Lara's Crafts are nice because the center is kind of marked right there in the middle.
Once you've drawn a line in the center, drill holes using a 1/16" drill bit (very tiny). Try to drill as close to the edge of the circle as you can because when you place the jump rings in them later, you won't have a lot of room. As you can see in the photos below, I used an old yucky piece of a 2x4 to put my danglies on when I drilled the holes. It made it easy to just go right through without worrying about what was underneath.
For the hearts, I didn't bother drawing a line because the point at the bottom and the (inverted) point at the top are in the center anyway. So I just drilled as close to the edge as I could. You can also see other holes in my 2x4 from the previous pieces I'd drilled. This drilling goes really fast!! Your danglies are not that thick, so it doesn't take long.
STEP 7
Paint the "danglies."
Get all the sawdust off them from the drilling first. Then paint your choice of color. I again went for white. I chose to only paint the fronts and sides. Let dry.
And, hey, those crazy stripes are cut from an old plastic tablecloth my kids used to use!
STEP 8
Screw in the 12 cup hooks in the 12 drilled holes in the board.
Your board should be dry by now. Just screw the 1/2" cup hooks into the holes you drilled on the bottom. Make sure the hooks are facing the right way--it's okay if they don't screw in tightly, they just need to be FACING the right way.
STEP 9
Write names and dates on the danglies, then link together using jump rings.
I just used a fine-point Sharpie marker to write the names and dates. If you've never used jump rings before (I hadn't, either), they are really easy to work with, given you have two pair of needle-nosed pliers. These two I actually bought in the jewelry section of my local craft store when I bought the jump rings. Anyway, you can see the gold jump rings on my table. Now look at the pliers on the left to see that I've got a jump ring I'm holding in there. All you need to do is hold each side of the jump ring with pliers, then twist in order to OPEN the jump ring. Then slide it through your drilled hole and then use the pliers to CLOSE the jump ring again. You can see I've done this on the bottom of the "Jordan" and on the top of the "Ethan."
Next I am about to put a jump ring IN BETWEEN these two, so that I'm linking the Jordan and the Ethan together.
You also need to put an extra jump ring on top of whichever circle (or heart) is at the top. In this case, it's going to be the Jordan. So the Jordan will have a jump ring through its top hole, just like the Ethan does, but then I will attach another jump ring to THAT one so that I have a jump ring to put over the hook for that month. Like this:
By the way, I recommend keeping your extra jump rings, wood pieces, paint, etc., in case there are new members of the family added! (whether through marriages or births)
STEP 10 (almost done!!)
Nail in a sawtooth hanger on the back.
Measure to find the center of your board, then place your sawtooth hanger in the center and nail it in. Those little tiny nails are real buggers to try to hold while you're nailing, so I got a larger nail and tapped it in just enough to get the hole started. That way, the tiny nails stood up on their own and they were easy to pound in.
STEP 11
Make your home beautiful or knock the socks off whoever is lucky enough to receive this as a gift!!